Because I found this tutorial NuttX chanal and I remember that I have an old Nokia 3310 display, I continu to test NuttX using Nucleo L476RG board.
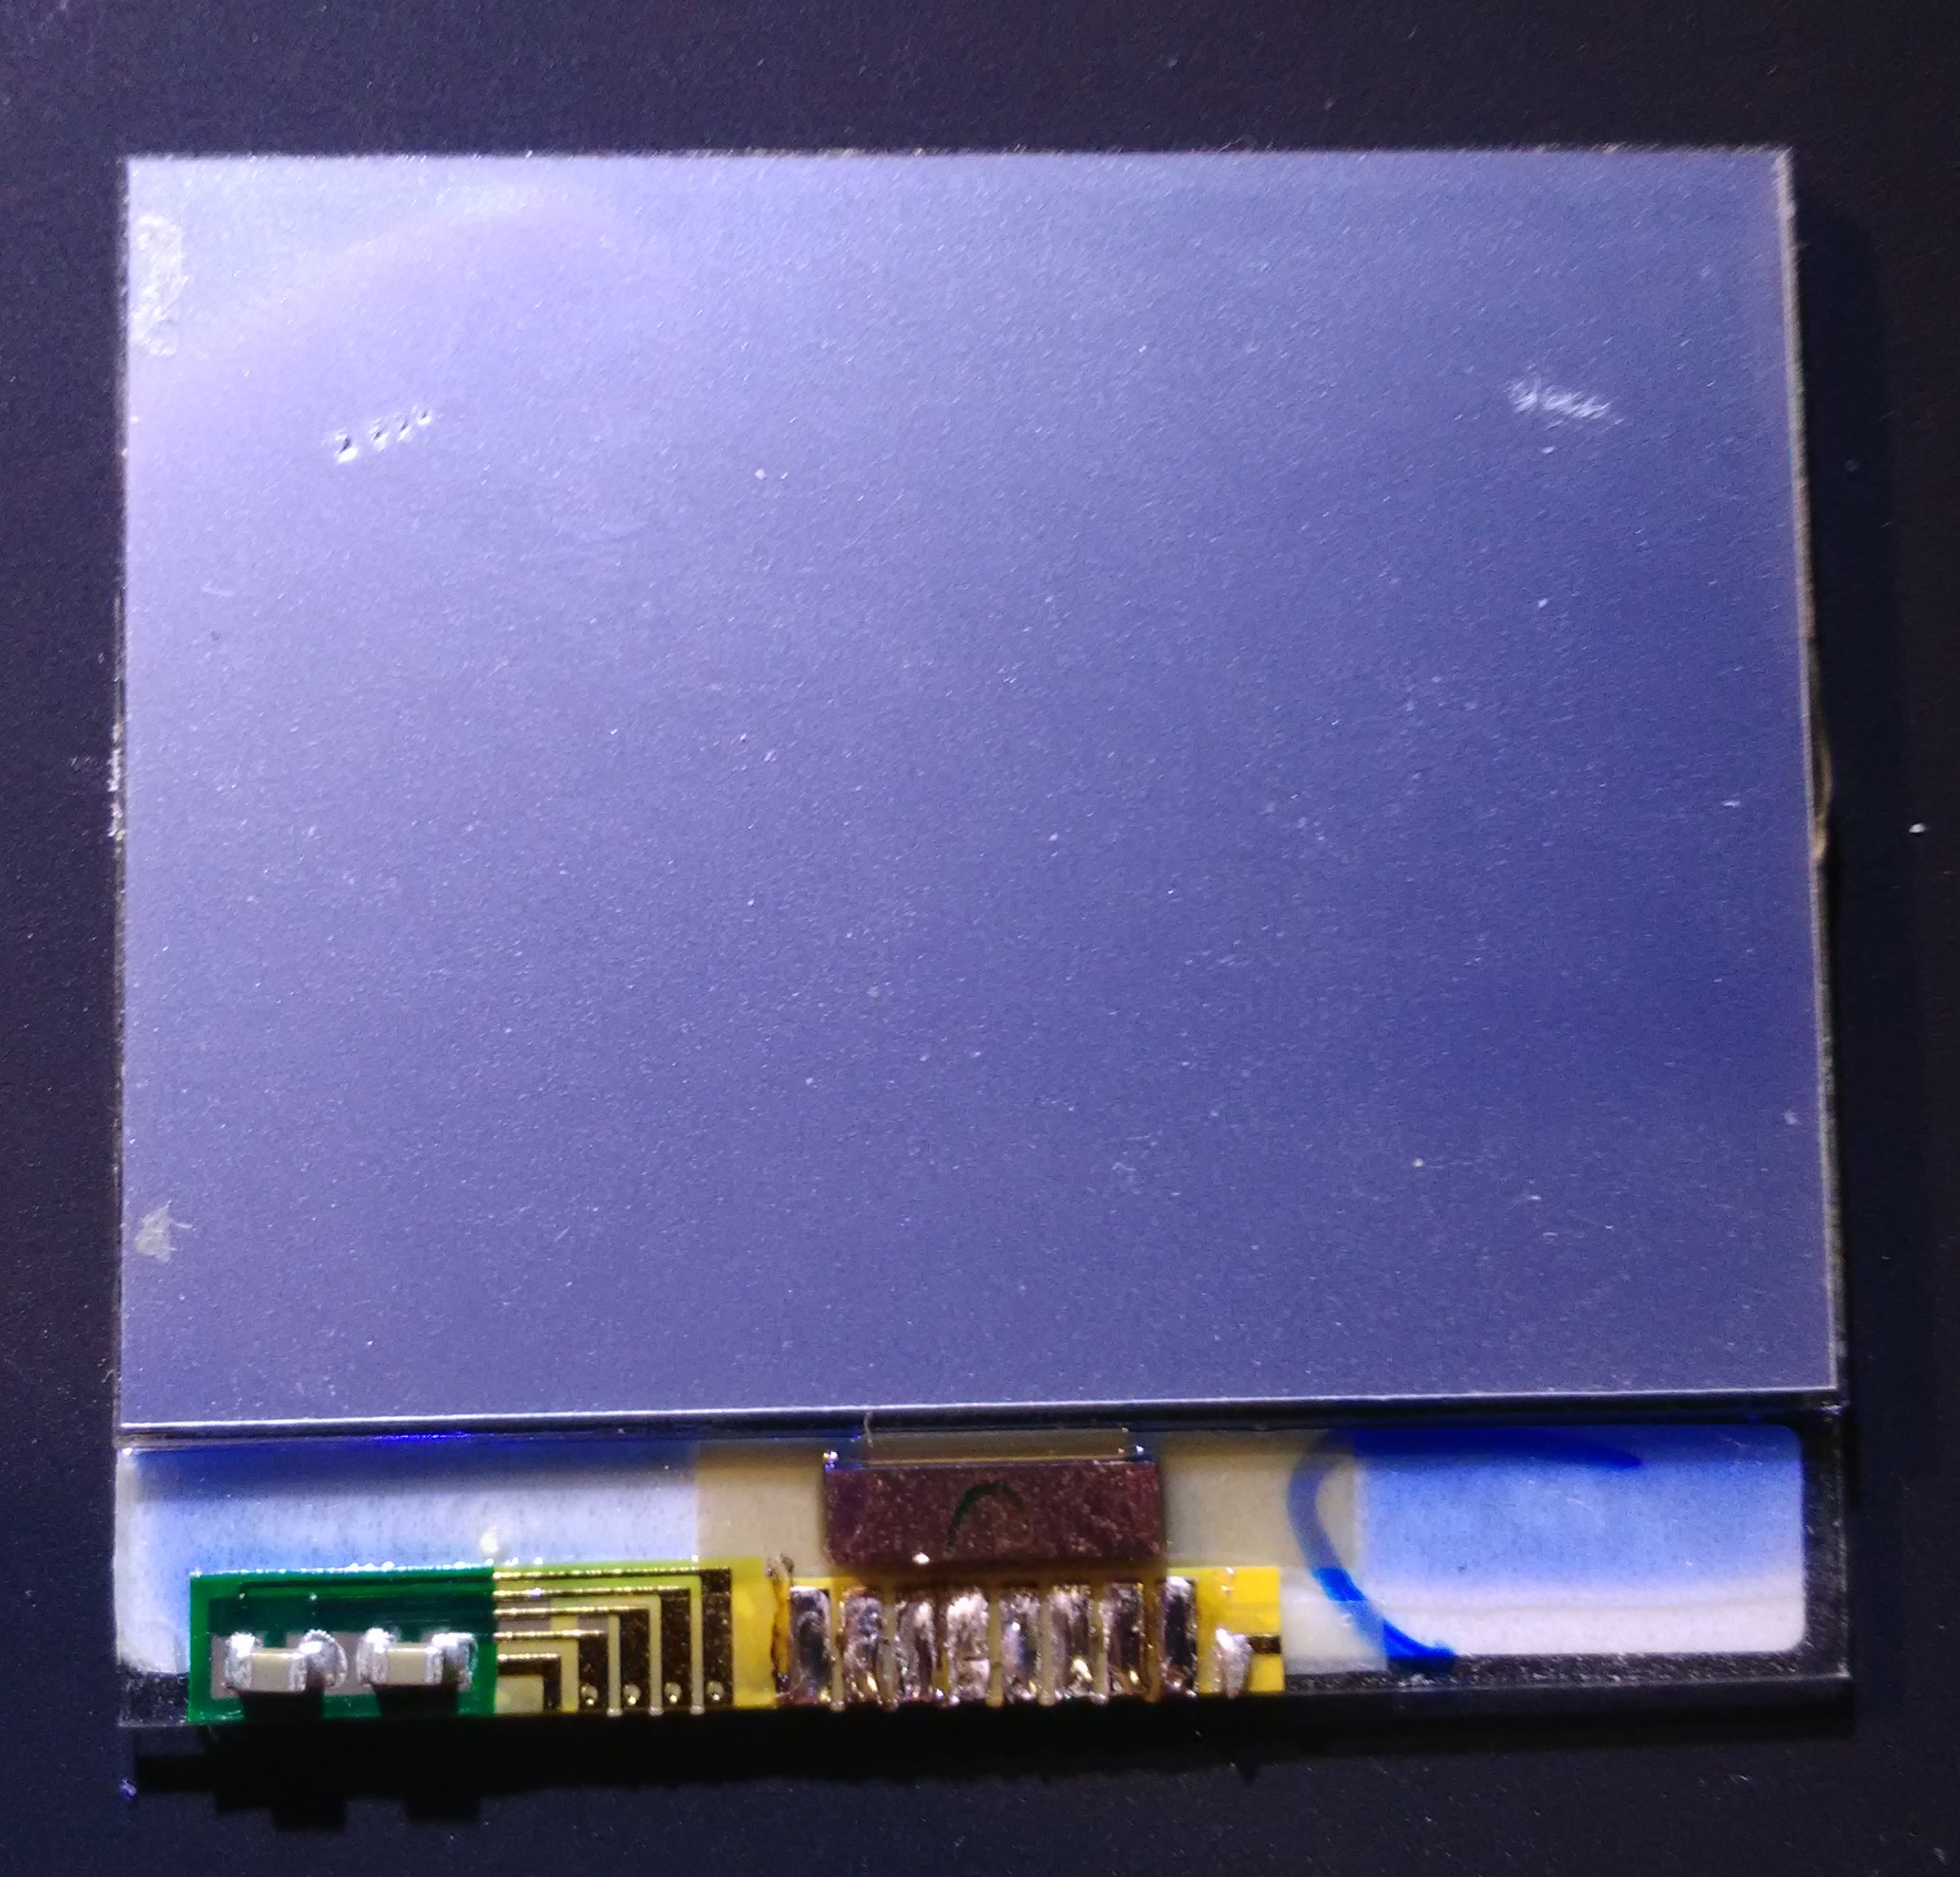
Here are the pins configuration on Nokia 3310 display.
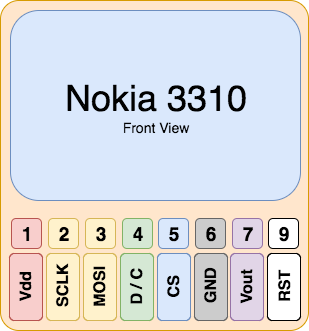
Nokia 3310 pinout
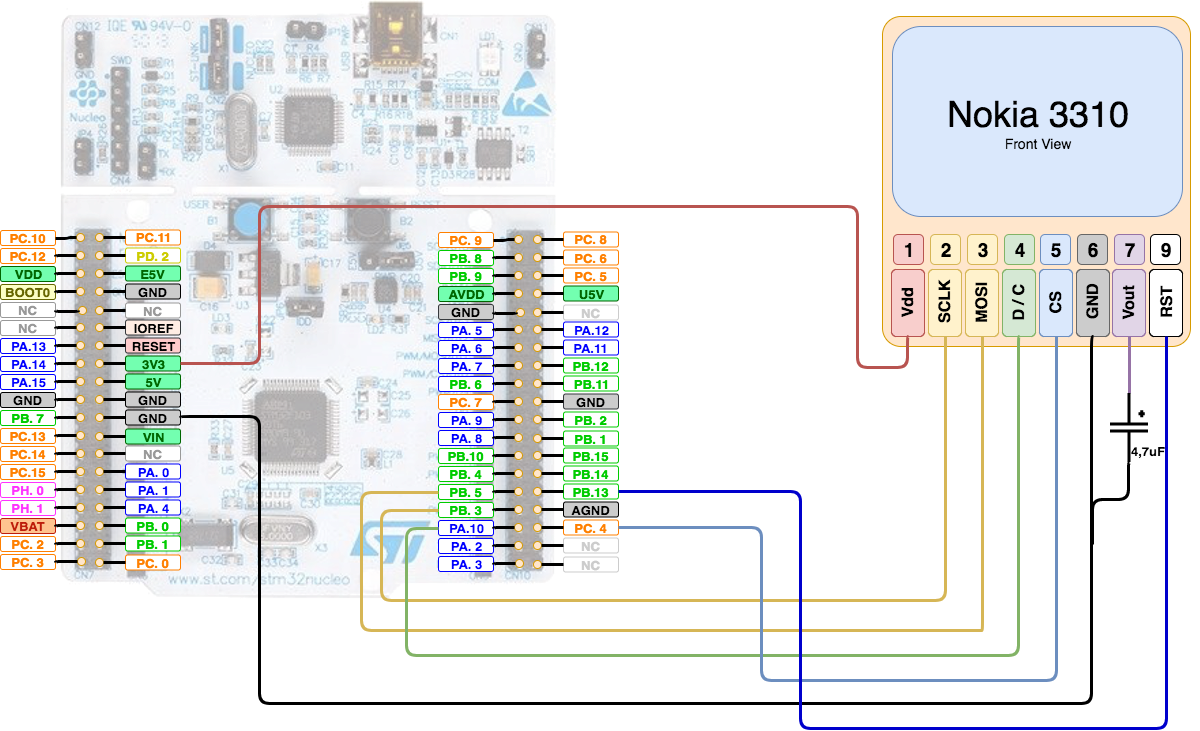
In order to interconnect the Nokia LCD 3310 with the Nucleo board I decide to use this configuration:
Nokia LCD Nucleo Board
VDD------------------------3V3
SCLK<-----------------------PB3
MOSI<-----------------------PB5
D/C<-----------------------PA10
CS<-----------------------PC4
GND------------------------GND
Vout------------------------4,7uF
RST<-----------------------PB.13
The schematic connection between the Nucelo board and the Nokia 3310 LCD.
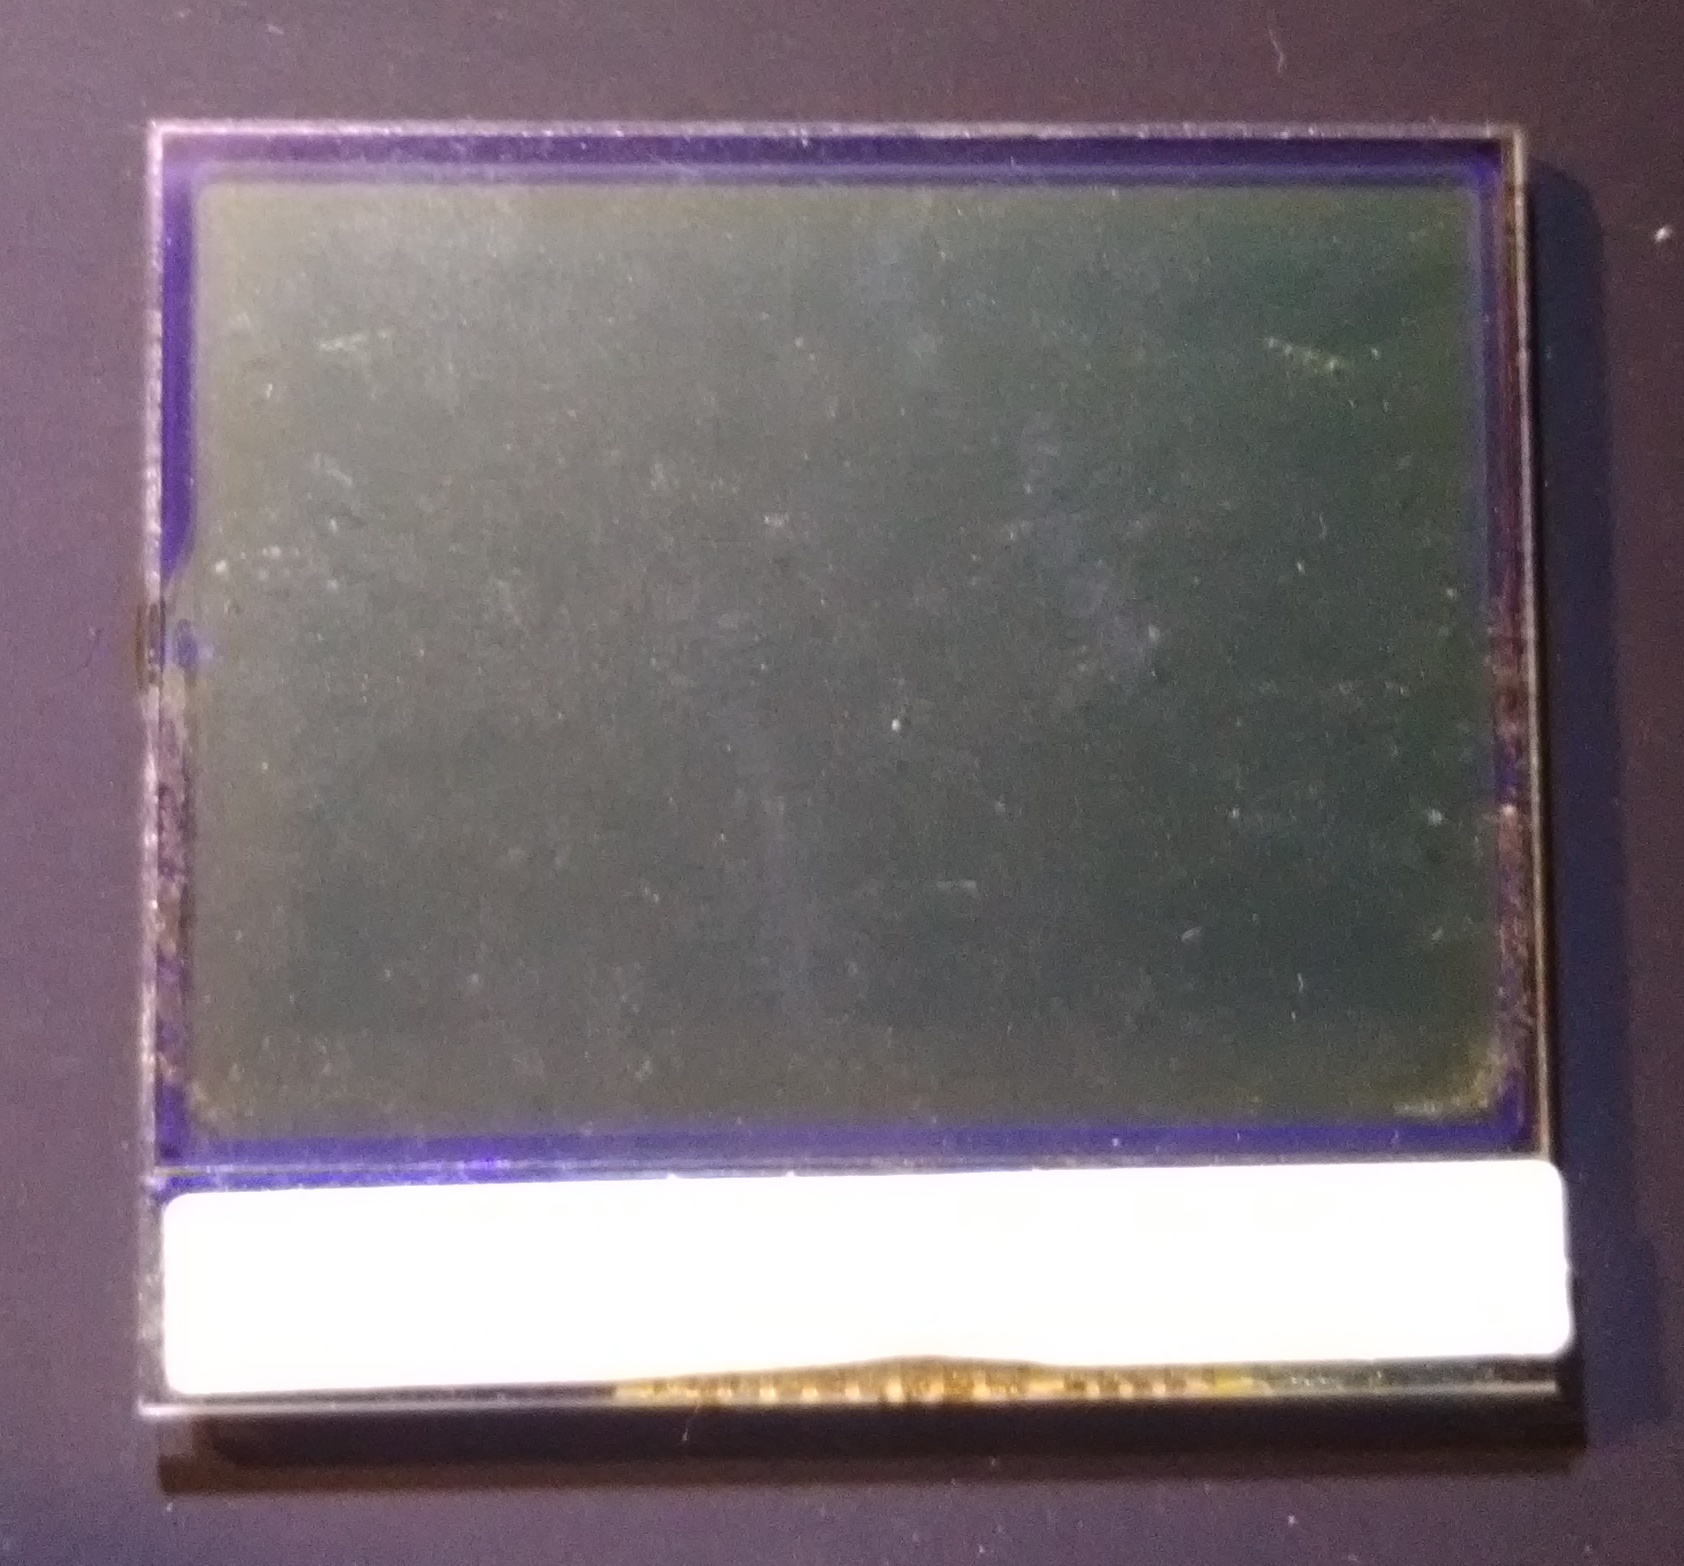
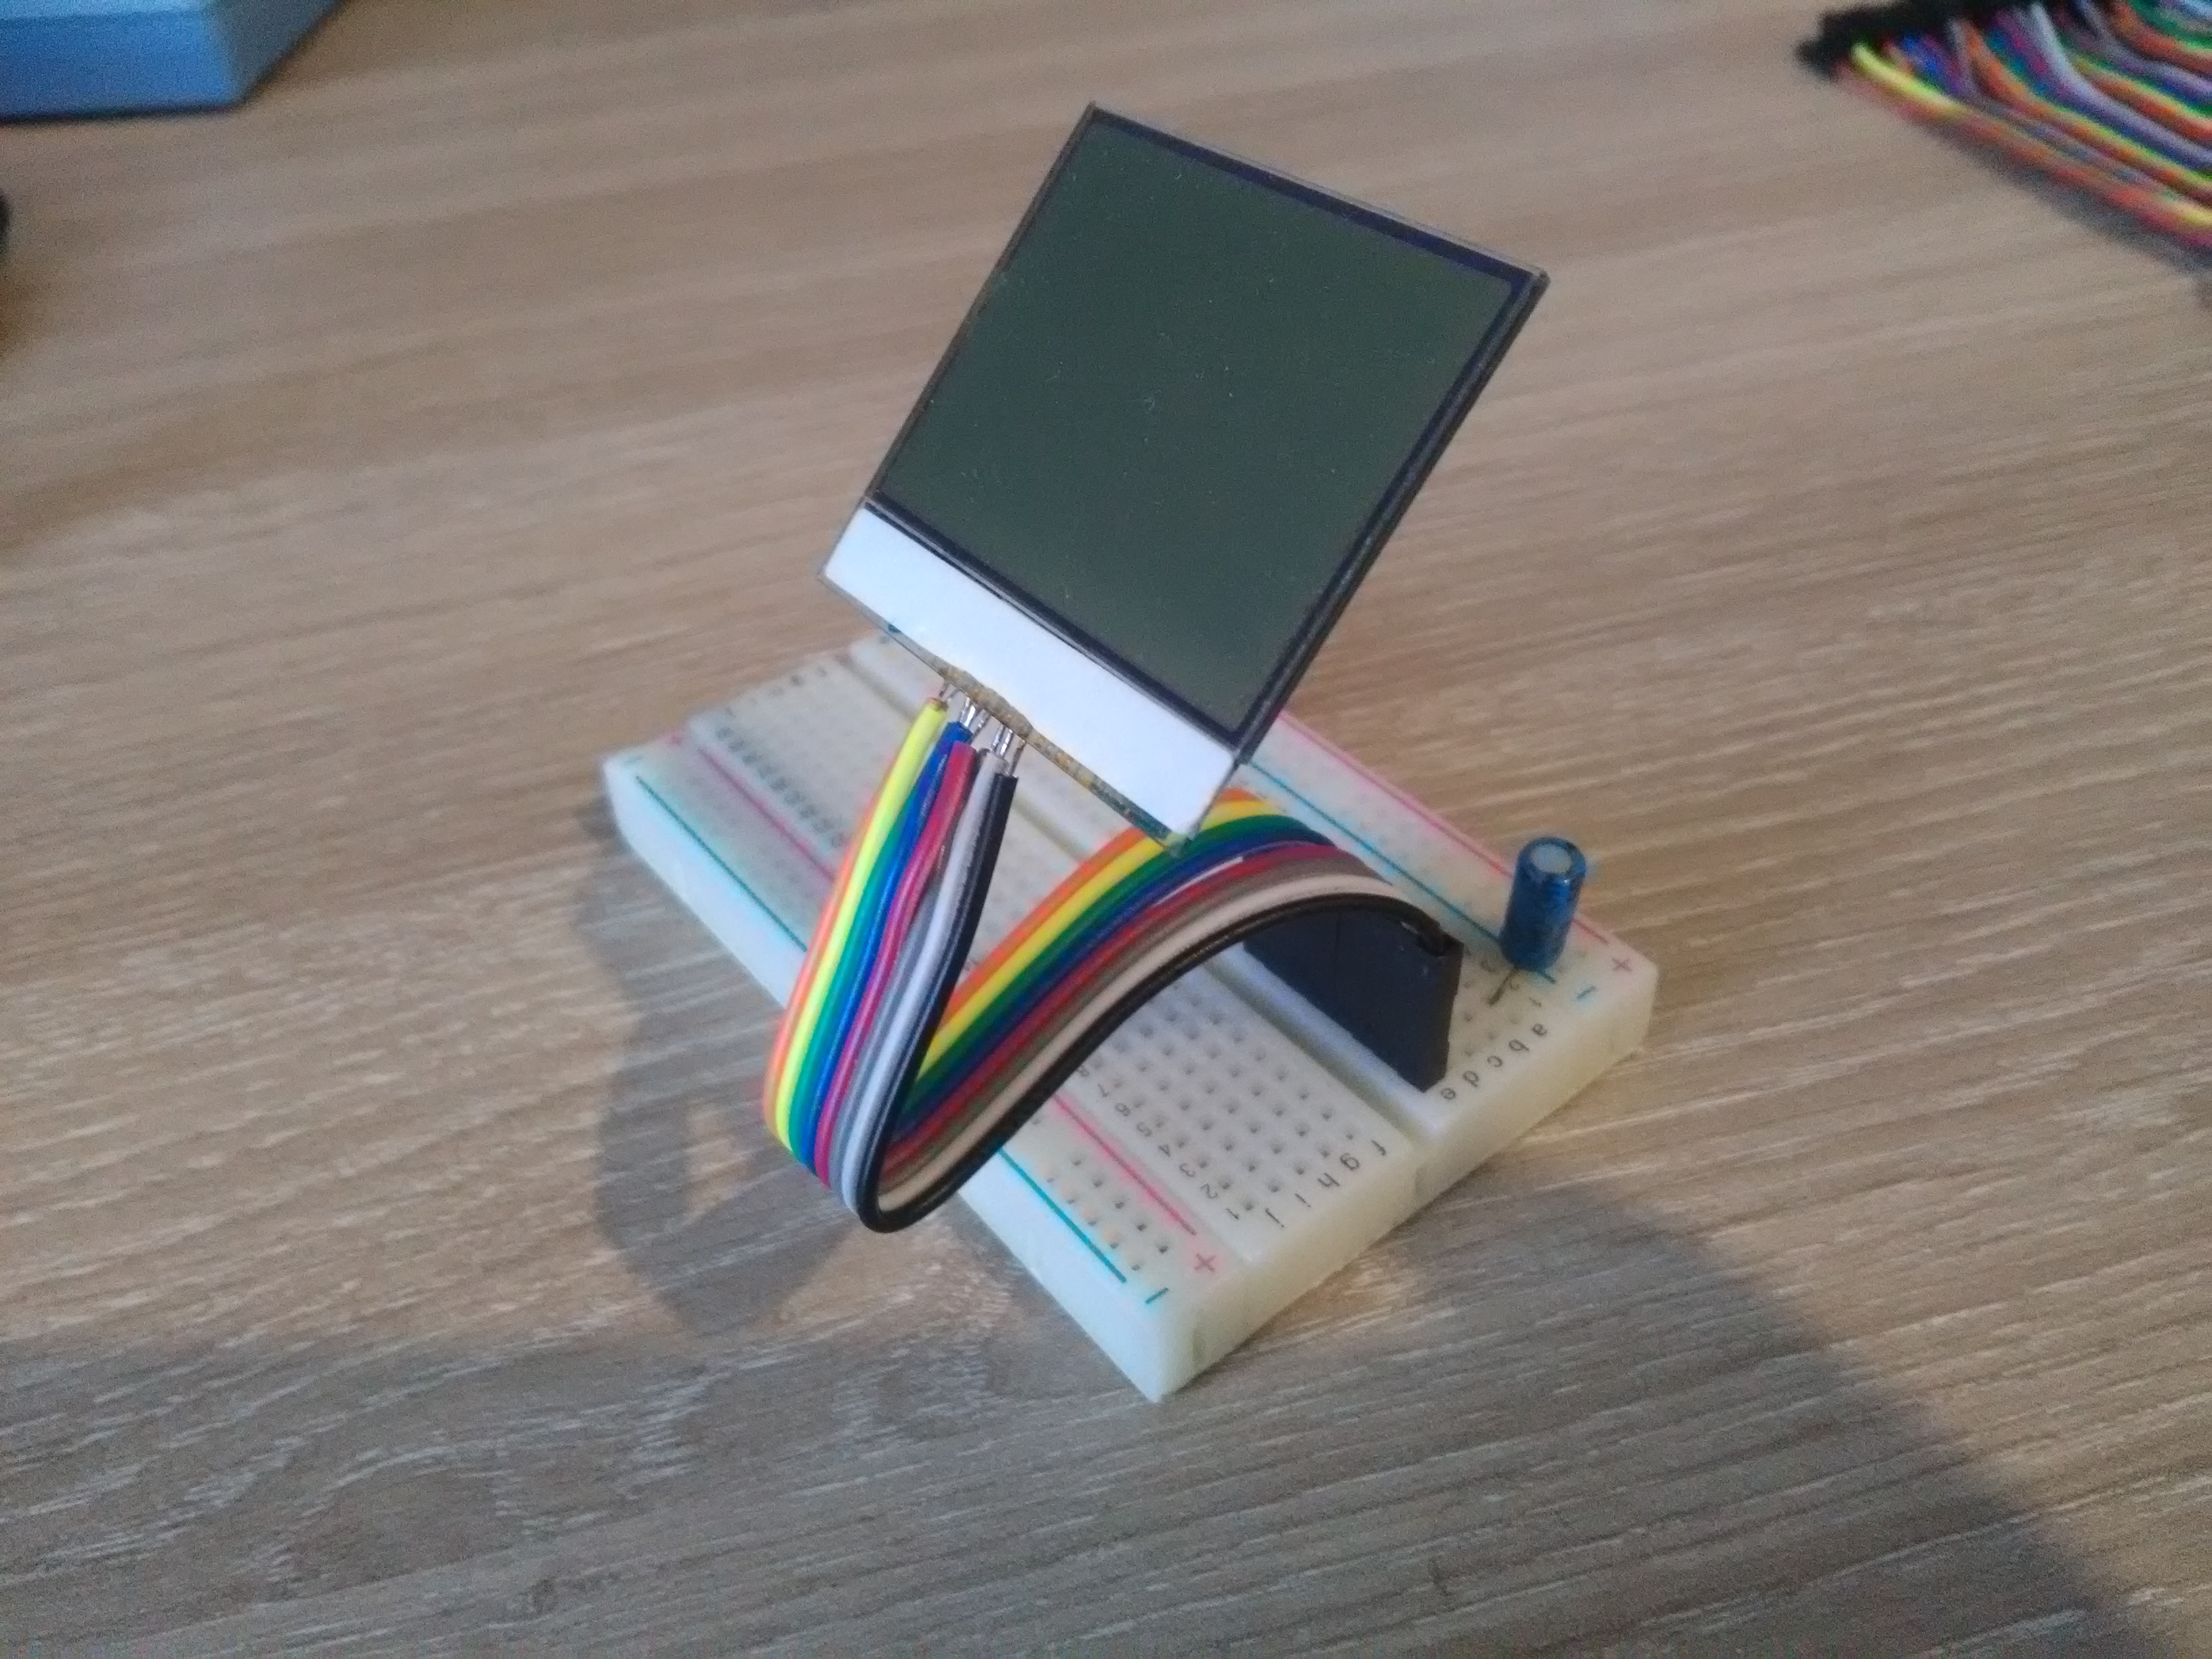
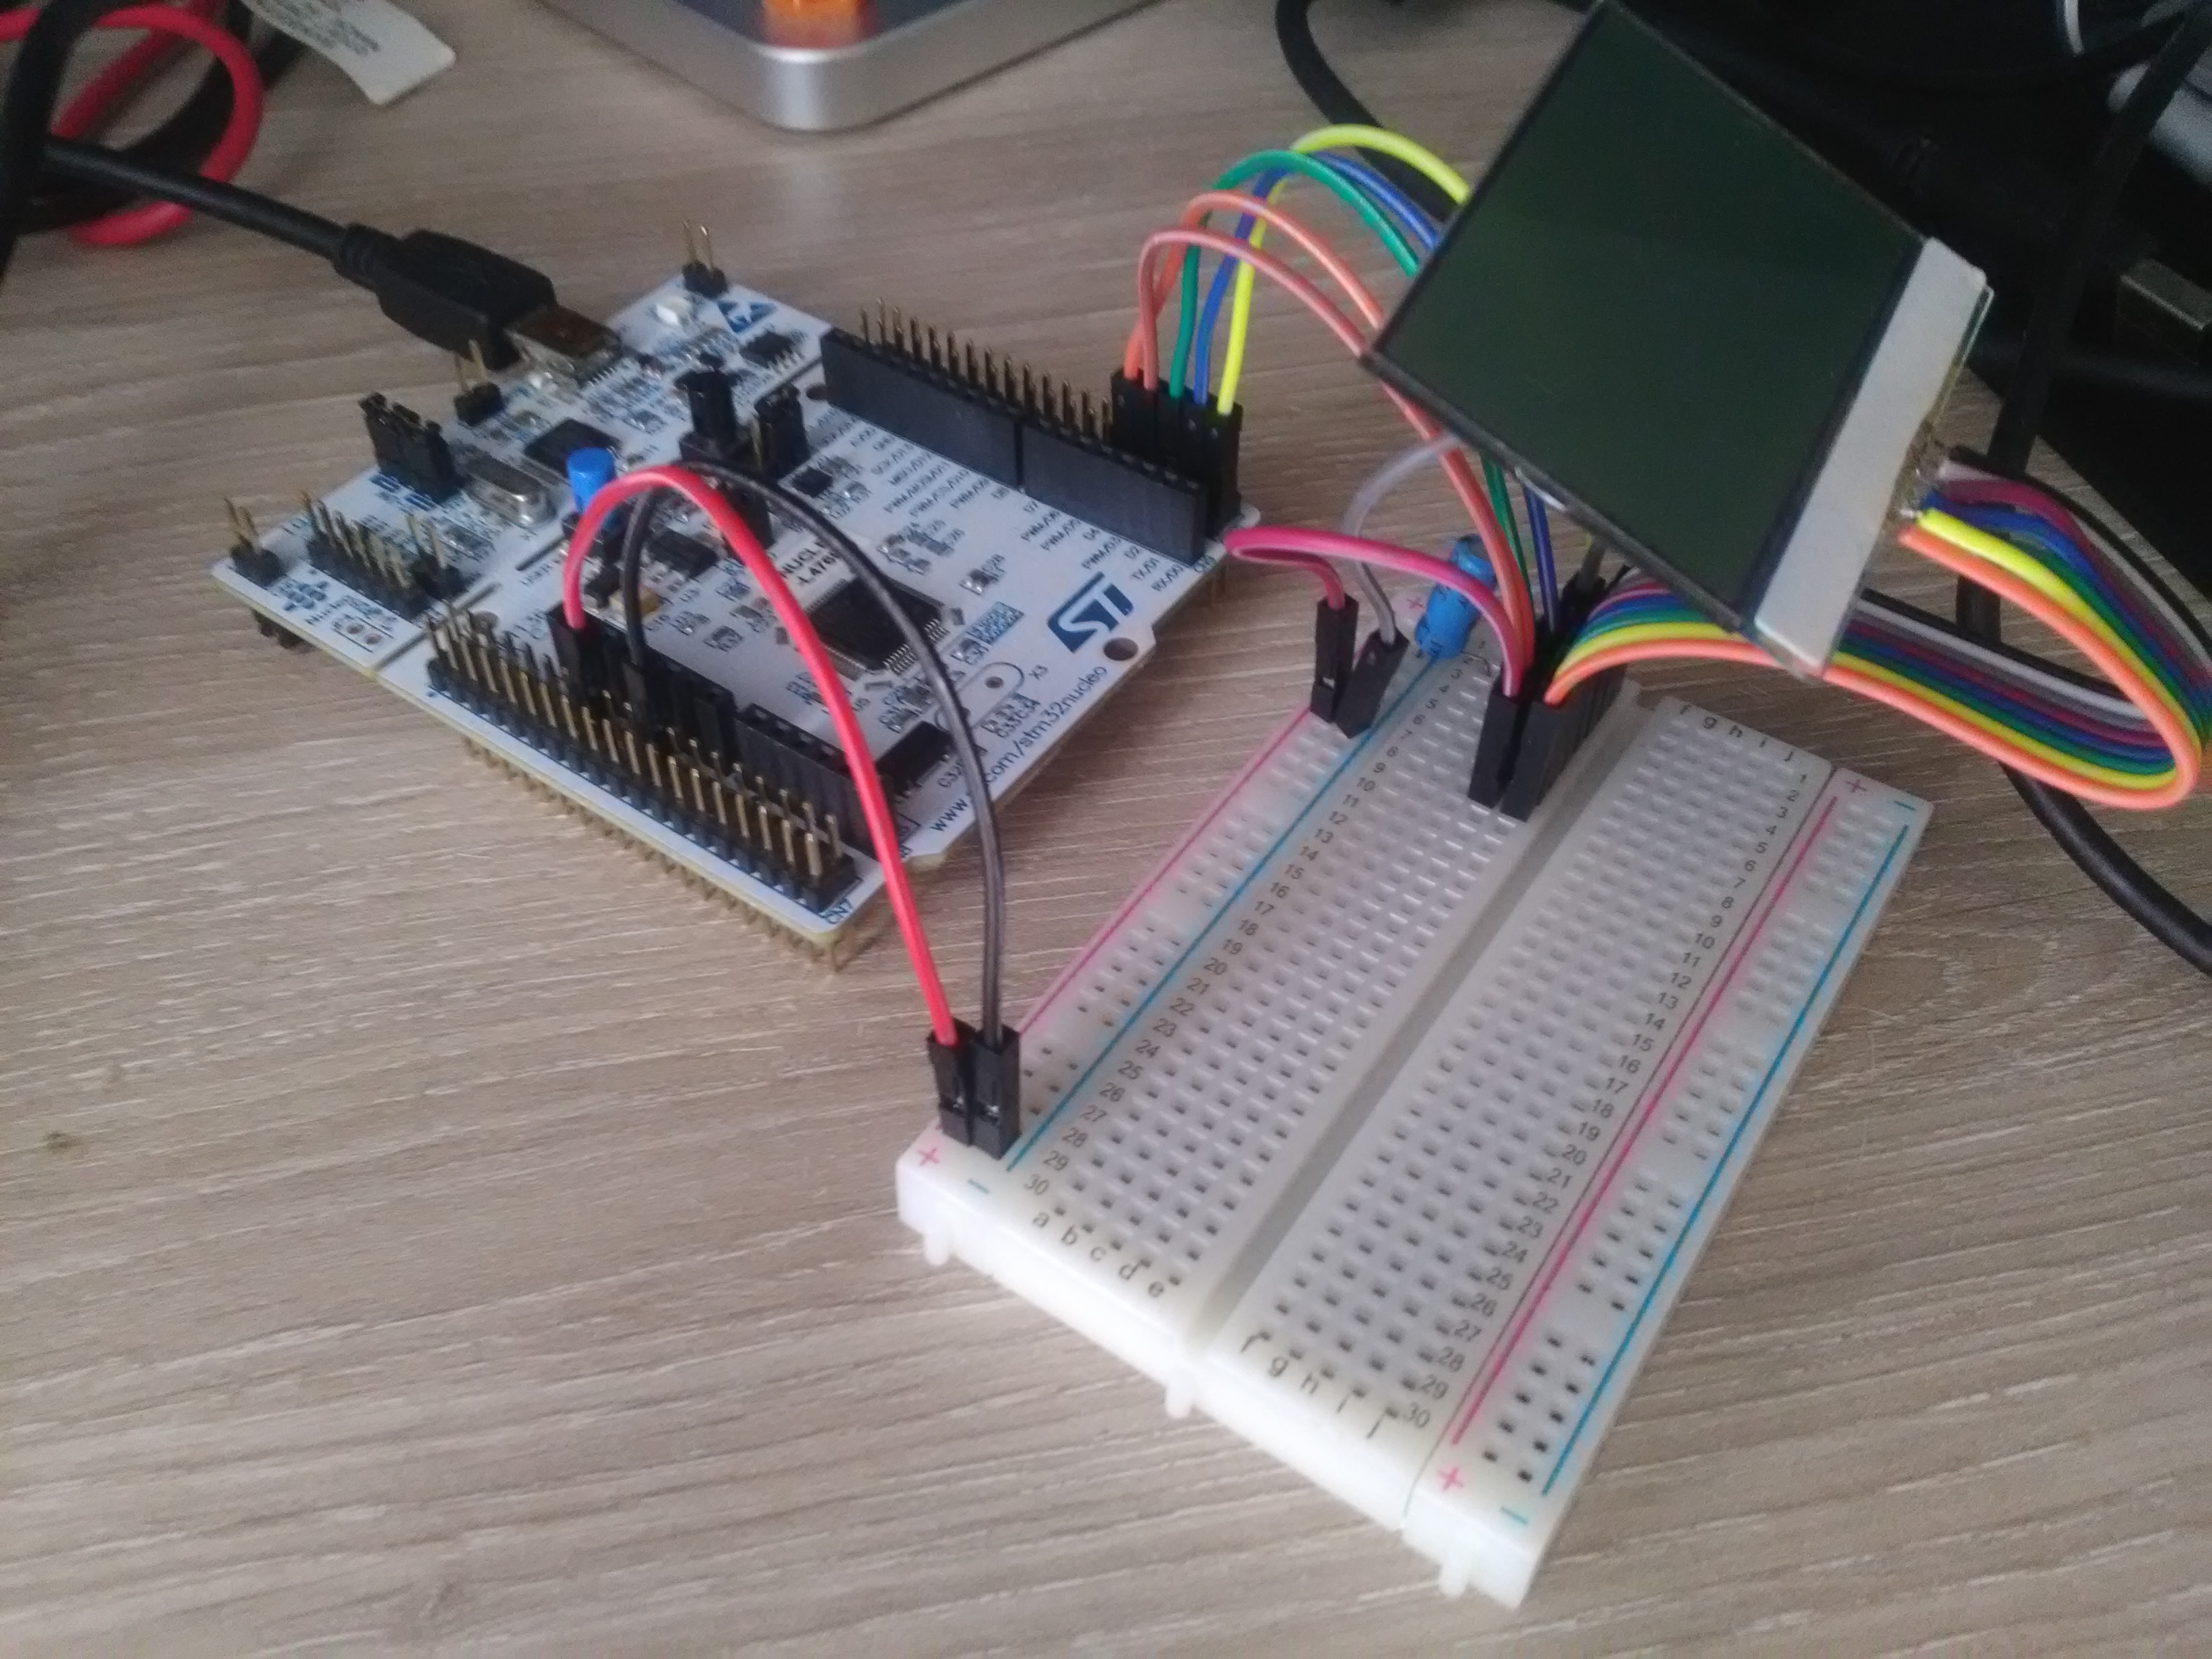
Here are same images with real wire connection.
Now let's try to display something on display. The commands to do this are:
- cd ~/nuttxspace/nuttx/
- make distclean
- cd tools/
- ./configure.sh nucleo-l476rg/nsh
- cd ..
- make menuconfig
And in the makeconfig we must activate SPI1, SPI CMD/DATA, LCD Graphic Support and NX Graphic Support:
- System Type ---> STM32 Peripheral Support ---> SPI1
- Device Driver ---> SPI Driver Support ---> SPI CMD/DATA
---> LCD Driver Support ---> Graphic LCD Driver Support ---> Nokia 5110 LCD Display - Graphic Support ---> NX Graphic ---> Supported Pixel Depths ---> Disable 1BPP
---> Font Selection ---> Mono 5x8 - Application Configuration ---> Examples ---> NX Graphic "Hello, World!" example ---> Bits-Per-Pixel (1)
However you can follow this steps on NuttX Channel.
The next step is to compile the code by running make. And here is the output console :
make[1]: Leaving directory '/home/miti/nuttxspace/nuttx/libnx'
make[1]: Entering directory '/home/miti/nuttxspace/nuttx/arch/arm/src'
make[2]: Entering directory '/home/miti/nuttxspace/nuttx/configs/nucleo-l476rg/src'
CC: stm32_boot.c
CC: stm32_spi.c
CC: stm32_autoleds.c
CC: stm32_appinit.c
AR: stm32_boot.o stm32_spi.o stm32_autoleds.o stm32_appinit.o
make[2]: Leaving directory '/home/miti/nuttxspace/nuttx/configs/nucleo-l476rg/src'
LD: nuttx
/home/miti/nuttxspace/nuttx/lib/libapps.a(nxhello_main.o): In function `nxhello_initialize':
/home/miti/nuttxspace/apps/examples/nxhello/nxhello_main.c:157: undefined reference to `board_lcd_initialize'
/home/miti/nuttxspace/apps/examples/nxhello/nxhello_main.c:167: undefined reference to `board_lcd_getdev'
Makefile:203: recipe for target 'nuttx' failed
make[1]: *** [nuttx] Error 1
make[1]: Leaving directory '/home/miti/nuttxspace/nuttx/arch/arm/src'
Makefile.unix:416: recipe for target 'pass2' failed
make: *** [pass2] Error 2
Oups...why we have this error ??? The answer is very simple: in the make menuconfig we have activated the driver to work with the LCD but the NuttX don't knows what are exactly the pins to use with the driver. For example the Nucleo-l476rg (STM32L476RG) has SPI1 in PORT A and PORT B, the pins CS, CD and RST must be defined.
Now because we identified the problems, let's try to resolve them.
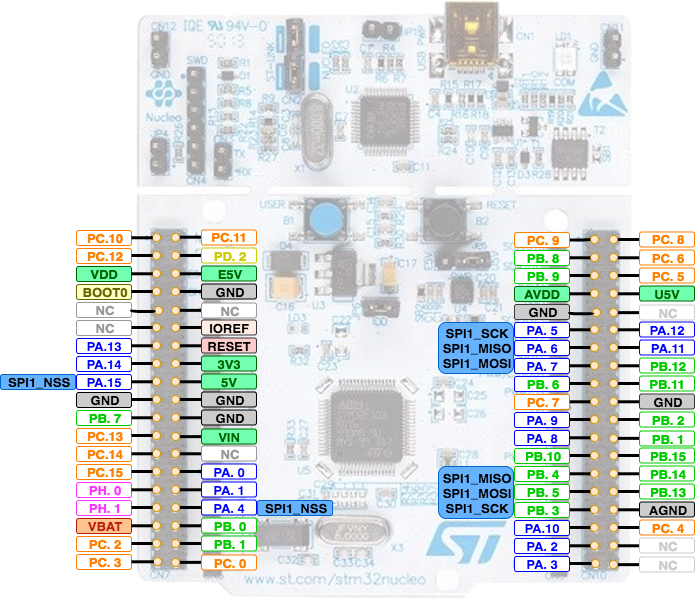
The fist thing we must do is to set the SPI1 port to work with the pins PB_3, PB_5. The place where you can change that is on board.h file, of course in the nucleo board directory which is nuttspace -> nuttx -> configs -> nucleo-l476rg -> include. Here we must change GPIO_SPI1_MISO_1, GPIO_SPI1_MOSI_1, GPIO_SPI1_SCK_1 to GPIO_SPI1_MISO_2, GPIO_SPI1_MOSI_2, GPIO_SPI1_SCK_2. If we take a look on the file stm32l4x6xx_pinmap.h we can see the configuration of GPIO and the pin used for this.
#define GPIO_SPI1_NSS_1 (GPIO_ALT|GPIO_AF5 |GPIO_PORTA|GPIO_PIN4)
#define GPIO_SPI1_NSS_2 (GPIO_ALT|GPIO_AF5 |GPIO_PORTA|GPIO_PIN15)
#define GPIO_SPI1_NSS_3 (GPIO_ALT|GPIO_AF5 |GPIO_PORTE|GPIO_PIN12)
#define GPIO_SPI1_NSS_4 (GPIO_ALT|GPIO_AF5 |GPIO_PORTG|GPIO_PIN5)
#define GPIO_SPI1_SCK_1 (GPIO_ALT|GPIO_AF5 |GPIO_PORTA|GPIO_PIN5)
#define GPIO_SPI1_SCK_2 (GPIO_ALT|GPIO_AF5 |GPIO_PORTB|GPIO_PIN3)
#define GPIO_SPI1_SCK_3 (GPIO_ALT|GPIO_AF5 |GPIO_PORTE|GPIO_PIN13)
#define GPIO_SPI1_SCK_4 (GPIO_ALT|GPIO_AF5 |GPIO_PORTG|GPIO_PIN2)
#define GPIO_SPI1_MOSI_1 (GPIO_ALT|GPIO_AF5 |GPIO_PORTA|GPIO_PIN7)
#define GPIO_SPI1_MOSI_2 (GPIO_ALT|GPIO_AF5 |GPIO_PORTB|GPIO_PIN5)
#define GPIO_SPI1_MOSI_3 (GPIO_ALT|GPIO_AF5 |GPIO_PORTE|GPIO_PIN15)
#define GPIO_SPI1_MOSI_4 (GPIO_ALT|GPIO_AF5 |GPIO_PORTG|GPIO_PIN4)
#define GPIO_SPI1_MISO_1 (GPIO_ALT|GPIO_AF5 |GPIO_PORTA|GPIO_PIN6)
#define GPIO_SPI1_MISO_2 (GPIO_ALT|GPIO_AF5 |GPIO_PORTB|GPIO_PIN4)
#define GPIO_SPI1_MISO_3 (GPIO_ALT|GPIO_AF5 |GPIO_PORTE|GPIO_PIN14)
#define GPIO_SPI1_MISO_4 (GPIO_ALT|GPIO_AF5 |GPIO_PORTG|GPIO_PIN3)
Then we must define the CS, C/D, and RTS pins. These pins must be defined on nucleo-l476rg.h like this :
#ifdef CONFIG_LCD_PCD8544
#define STM32_LCD_CS (GPIO_OUTPUT|GPIO_PULLUP|GPIO_SPEED_2MHz|\
GPIO_OUTPUT_SET|GPIO_PORTC|GPIO_PIN4)#define STM32_LCD_CD (GPIO_OUTPUT|GPIO_PULLUP|GPIO_SPEED_2MHz|\
GPIO_OUTPUT_SET|GPIO_PORTA|GPIO_PIN10)#define STM32_LCD_RST (GPIO_OUTPUT|GPIO_PULLUP|GPIO_SPEED_2MHz|\
GPIO_OUTPUT_SET|GPIO_PORTB|GPIO_PIN13)#endif
We can see that the CS pin is connected to PC_4, C/D pin is connected to PA_10 and RST si connected to PB_13 as output and they are pulled up.
However to make it work, some file must be added or modified: nucleo-l476rg.h, makefile, stm32_spi, stm32_pcd8544.c and board.h. Here below you can download a patch I created fore those of you who want to test it.
[wpdm_package id='217']
And now the video demo...
Or check the video here.

4 Comments
Alan C. Assis · 10/10/2017 at 5:54 pm
Hi Mihail,
How are you? I think you should be very busy currently.
Your tutorials are very nice! I hope you find more time to create new tutorials.
BR, Alan
CMN_Lab · 10/10/2017 at 7:09 pm
Hi Alan,
Thank you for your kind words. I was very busy the last months but I will try to find more time to post new experiences with NuttX.
Regards,
Mihail
Alan C. Assis · 10/10/2017 at 9:53 pm
Hi Mihail,
Great!!! I want to suggest you to submit your board support for Nokia display to the NuttX mainline, it could be useful for other people.
I want to produce more videos using the BluePill board (stm32f103-minimum) because this board is really cheap, but it doesn’t have enough memory to test more advanced features like RAMDisk, 6LoWPAN, etc.
Maybe for the next level tutorials I will use nucleo-l476rg or stm32f4discovery, not sure yet.
BR,
Alan
CMN_Lab · 11/10/2017 at 7:15 am
What is the best way to submit for board support? To make patch and to send directly to Greg ?
I use nucleo-l476rg because it’s very low power MCU but stm32f4dicovery is more powerful.
Anyway the two boards work very good, depend on application type.
BR,
Mihail